Article
MCollective安装配置
puppet agent 通过定时拉取的方式来更新本地系统,但无法满足实时更新的需求。 mcollective 通过 消息中间件 的方式,mclient/mservers通过消息的推送/订阅,实现mservers实时执行mclient提交的请求。(添加 m 说明是mcollective的组件!)
最新版的安装除了官网,没有其他可以直接学习的资料(只能参考)。先看官网的资料:
- 组件功能(必须看看) https://docs.puppet.com/mcollective/overview_components.html
- 部署 https://docs.puppet.com/mcollective/deploy/install.html
- 部署规范/准则 https://docs.puppet.com/mcollective/deploy/standard.html
摘录官网安装描述:[Installing MCollective requires the following steps]
- Make sure your middleware is up and running and your firewalls are in order.
- Install the mcollective package on servers, then make sure the mcollective service is running.
- Install the mcollective-client package on admin workstations.
- Most Debian-like and Red Hat-like systems can use the official Puppet Labs packages. Enable the Puppet Labs repos, or import the packages into your own repos.
- If you’re on Debian/Ubuntu, mind the missing package dependency.
- If your systems can’t use the official packages, check the system requirements and either build your own or run from source.
mcollective对于puppet来说是一个锦上添花的组件,没有puppet一样正常运转。部署主要由两个部分组成:
- 部署消息中间件
- 配置mcollective(puppet4.4 agent已经安装该功能,redhat也自带装了Stomp包:
/opt/puppetlabs/puppet/lib/ruby/gems/2.1.0/gems/目录下面)- 配置mclient/mserver
- 配置Stomp with TLS
- 配置security
本文先简单实现连接远程主机,然后配置安全功能,最后用puppet来重新实现 mcollective 的安装和配置。
# 环境说明
- hadoop-master2:
- 172.17.42.1
- puppetserver, activemq-server, mcollective-client
- hadoop-master1/hadoop-slaver1/hadoop-slaver2:
- 172.17.0.2/3/4
- puppet-agent, mcollective-server
# ActiveMQ部署
activemq的服务端是一个spring-jetty项目,直接解压运行启动脚本即可。
# http://activemq.apache.org/download-archives.html
# 直接下载最新的 tar.gz
# 解压,启动
On Unix:
From a command shell, change to the installation directory and run ActiveMQ as a foregroud process:
cd [activemq_install_dir]/bin
./activemq console
From a command shell, change to the installation directory and run ActiveMQ as a daemon process:
cd [activemq_install_dir]/bin
./activemq start
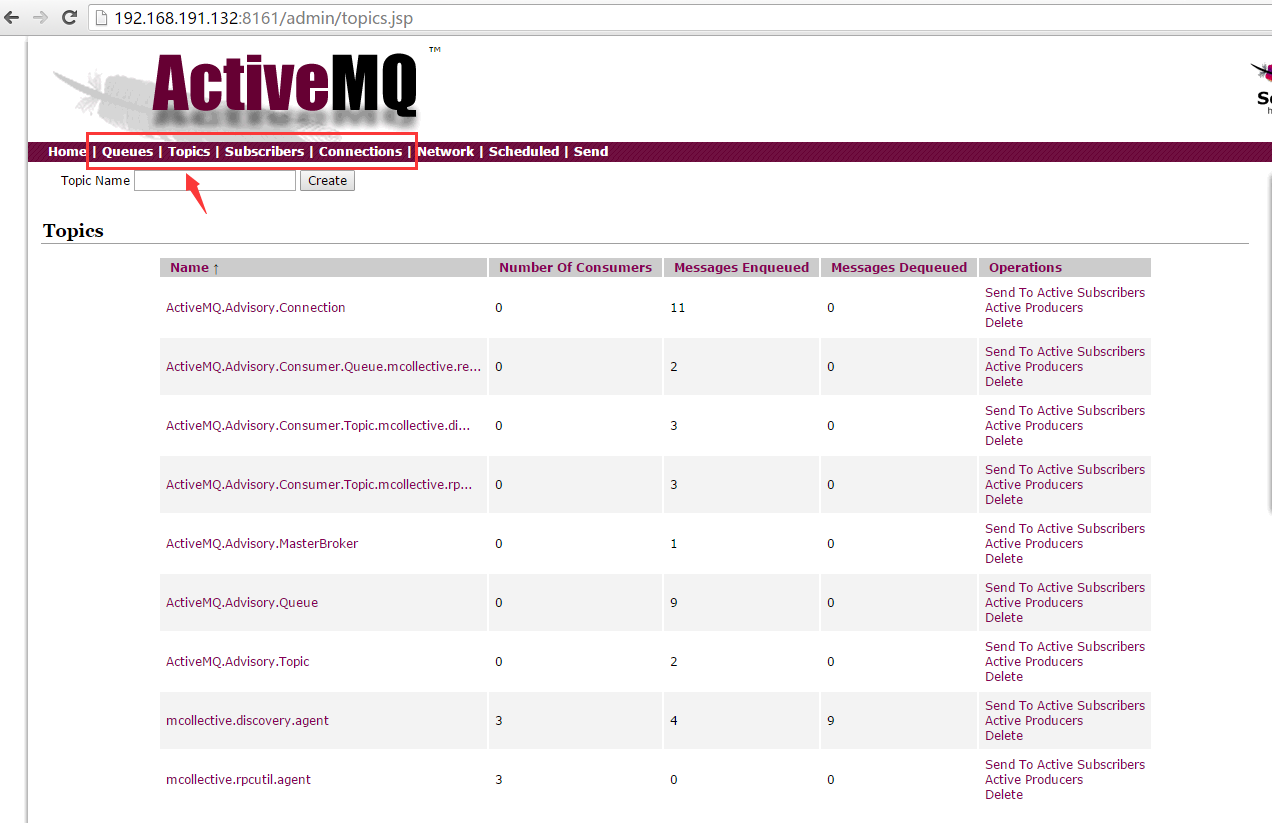
# 确认
URL: http://127.0.0.1:8161/admin/
Login: admin
Passwort: admin
# 起了好多端口,随便试一个
netstat -nl|grep 61616
netstat -anp|grep PID
# 数据/日志目录
[root@hadoop-master2 apache-activemq-5.13.2]# ll data/
total 16
-rw-r--r-- 1 root users 4276 Apr 27 21:36 activemq.log
-rw-r--r-- 1 root root 5 Apr 27 21:36 activemq.pid
-rw-r--r-- 1 root root 0 Apr 27 21:36 audit.log
drwxr-xr-x 2 root root 4096 Apr 27 21:36 kahadb
查看连接密码:
[root@hadoop-master2 conf]# cat credentials.properties
...
activemq.username=system
activemq.password=manager
guest.password=password[root@hadoop-master2 conf]#
# 简单配置(unencrypted Stomp)
安装puppet4.4后,mcollective已经安装好了!直接修改配置连接到activemq即可。
[root@hadoop-master2 puppetlabs]# chkconfig --list | grep mco
mcollective     0:off   1:off   2:off   3:off   4:off   5:off   6:off

# puppetserver作为mcollective-client
[root@hadoop-master2 mcollective]# cat client.cfg
...
connector = activemq
plugin.activemq.pool.size = 1
plugin.activemq.pool.1.host = hadoop-master2.example.com
plugin.activemq.pool.1.port = 61613
plugin.activemq.pool.1.user = system
plugin.activemq.pool.1.password = manager
...

[root@hadoop-master2 mcollective]# mco ping

---- ping statistics ----
No responses received

# puppet agent作为mcollective-server
-bash-4.1# cat server.cfg
...
connector = activemq
plugin.activemq.pool.size = 1
plugin.activemq.pool.1.host = hadoop-master2.example.com
plugin.activemq.pool.1.port = 61613
plugin.activemq.pool.1.user = system
plugin.activemq.pool.1.password = manager
...

-bash-4.1# service mcollective start
Starting mcollective:                                      [  OK  ]
-bash-4.1# service mcollective status
mcollectived (pid  202) is running...

# 其他两台agent机器一样的配置操作

# 1. mcollective-client(puppetserver) 测试
[root@hadoop-master2 ~]# mco find
hadoop-master1
hadoop-slaver2
hadoop-slaver1
[root@hadoop-master2 mcollective]# mco ping
hadoop-master1                           time=148.29 ms
hadoop-slaver2                           time=187.99 ms
hadoop-slaver1                           time=190.21 ms

---- ping statistics ----
3 replies max: 190.21 min: 148.29 avg: 175.50

# 2. 先查看/扫描节点状态。(如果配置了facts后,会输出一长串的Facts!)
[root@hadoop-master2 ssl]# mco inventory hadoop-master1
Inventory for hadoop-master1:

   Server Statistics:
                      Version: 2.8.8
                   Start Time: 2016-04-29 00:21:31 +0800
                  Config File: /etc/puppetlabs/mcollective/server.cfg
                  Collectives: mcollective
              Main Collective: mcollective
                   Process ID: 155
               Total Messages: 13
      Messages Passed Filters: 3
            Messages Filtered: 0
             Expired Messages: 0
                 Replies Sent: 2
         Total Processor Time: 2.32 seconds
                  System Time: 0.3 seconds

   Agents:
      discovery       rpcutil

   Data Plugins:
      agent           collective      fact
      fstat

   Configuration Management Classes:
      No classes applied

   Facts:
      mcollective => 1

# 3. 获取节点facts,需要配合puppet一起来使用
# puppetserver节点 配置更新agent facts.yaml信息
[root@hadoop-master2 manifests]# cat site.pp
file{'/etc/puppetlabs/mcollective/facts.yaml':
  owner    => root,
  group    => root,
  mode     => '400',
  loglevel => debug, # reduce noise in Puppet reports
  content  => inline_template("<%= scope.to_hash.reject { |k,v| k.to_s =~ /(uptime_seconds|timestamp|free)/ }.to_yaml %>"), # exclude rapidly changing facts
}
# 读取facts
[root@hadoop-master2 manifests]# mco facts hostname
Report for fact: hostname

        hadoop-master1                           found 1 times
        hadoop-slaver1                           found 1 times
        hadoop-slaver2                           found 1 times

Finished processing 3 / 3 hosts in 579.93 ms
自带的插件功能比较少,要真正把 mcollective 用起来需要安装插件:puppet, service, package等等。这篇主要记录安装过程,插件安装以及使用后面具体实践了再写。
我觉得内网生产环境安装,到这一步已经差不多了!下面的安全配置就当深入学习吧。
# Stomp with TLS 配置
- https://docs.puppet.com/mcollective/reference/integration/activemq_ssl.html
- https://docs.puppet.com/mcollective/deploy/middleware/activemq_keystores.html
Anonymous TLS 步骤简单一点,这里就不列出来了,自己去看官网的文档: Anonymous TLS
# CA-Verified TLS
# 1 手动配置activemq
# 1.1 可以直接用puppet的cert/private-keys,我这里新生成一个activemq的证书
[root@hadoop-master2 puppetlabs]# puppet master --configprint ssldir
/etc/puppetlabs/puppet/ssl
# 一个不冲突的名称即可,不需要是hostname/FQDN
[root@hadoop-master2 puppetlabs]# puppet cert generate activemq
Notice: activemq has a waiting certificate request
Notice: Signed certificate request for activemq
Notice: Removing file Puppet::SSL::CertificateRequest activemq at '/etc/puppetlabs/puppet/ssl/ca/requests/activemq.pem'
Notice: Removing file Puppet::SSL::CertificateRequest activemq at '/etc/puppetlabs/puppet/ssl/certificate_requests/activemq.pem'
[root@hadoop-master2 puppetlabs]# tree /etc/puppetlabs/puppet/ssl/
/etc/puppetlabs/puppet/ssl/
...
├── certificate_requests
├── certs
│ ├── activemq.pem
│ ├── ca.pem
│ └── hadoop-master2.example.com.pem
├── crl.pem
├── private
├── private_keys
│ ├── activemq.pem
│ └── hadoop-master2.example.com.pem
└── public_keys
├── activemq.pem
└── hadoop-master2.example.com.pem
9 directories, 22 files
# certs/activemq.pem, certs/ca.pem, private_keys/activemq.pem 就是我们需要的。
# 1.2 创建Truststore
[root@hadoop-master2 puppetlabs]# which keytool
/opt/jdk1.7.0_60/bin/keytool
[root@hadoop-master2 puppetlabs]# cd /etc/puppetlabs/puppet/ssl
[root@hadoop-master2 ssl]# keytool -import -alias "CU CA" -file certs/ca.pem -keystore truststore.jks
Enter keystore password:
Re-enter new password:
Owner: CN=Puppet CA: hadoop-master2.example.com
Issuer: CN=Puppet CA: hadoop-master2.example.com
...
Trust this certificate? [no]: y
Certificate was added to keystore
[root@hadoop-master2 ssl]# ll
total 32
drwxr-xr-x 5 puppet puppet 4096 Apr 23 00:01 ca
drwxr-xr-x 2 puppet puppet 4096 Apr 28 19:53 certificate_requests
drwxr-xr-x 2 puppet puppet 4096 Apr 28 19:53 certs
-rw-r--r-- 1 puppet puppet 979 Apr 28 10:33 crl.pem
drwxr-x--- 2 puppet puppet 4096 Apr 22 23:51 private
drwxr-x--- 2 puppet puppet 4096 Apr 28 19:53 private_keys
drwxr-xr-x 2 puppet puppet 4096 Apr 28 19:53 public_keys
-rw-r--r-- 1 root root 1496 Apr 28 20:01 truststore.jks
# 验证下指纹fingerprints
[root@hadoop-master2 ssl]# keytool -list -keystore truststore.jks
Enter keystore password:
Keystore type: JKS
Keystore provider: SUN
Your keystore contains 1 entry
cu ca, Apr 28, 2016, trustedCertEntry,
Certificate fingerprint (SHA1): 40:2C:45:37:6B:C7:9C:92:E7:4D:1E:4F:2B:C4:17:F4:A3:5F:EB:56
[root@hadoop-master2 ssl]# openssl x509 -in certs/ca.pem -fingerprint -sha1
SHA1 Fingerprint=40:2C:45:37:6B:C7:9C:92:E7:4D:1E:4F:2B:C4:17:F4:A3:5F:EB:56
# 1.3 创建Keystore
[root@hadoop-master2 ssl]# cat private_keys/activemq.pem certs/activemq.pem >activemq.pem
# 所有密码都需一致!! All of these passwords must be the same.
[root@hadoop-master2 ssl]# openssl pkcs12 -export -in activemq.pem -out activemq.p12 -name activemq
Enter Export Password:
Verifying - Enter Export Password:
[root@hadoop-master2 ssl]# keytool -importkeystore -destkeystore keystore.jks -srckeystore activemq.p12 \
> -srcstoretype PKCS12 -alias activemq
Enter destination keystore password: XXX
Re-enter new password: XXX
Enter source keystore password: XXX
[root@hadoop-master2 ssl]# ll -t
total 52
-rw-r--r-- 1 root root 3918 Apr 28 20:12 keystore.jks
-rw-r--r-- 1 root root 4230 Apr 28 20:08 activemq.p12
-rw-r--r-- 1 root root 5203 Apr 28 20:07 activemq.pem
-rw-r--r-- 1 root root 1496 Apr 28 20:01 truststore.jks
...
# 验证指纹
[root@hadoop-master2 ssl]# keytool -list -keystore keystore.jks
Enter keystore password:
Keystore type: JKS
Keystore provider: SUN
Your keystore contains 1 entry
activemq, Apr 28, 2016, PrivateKeyEntry,
Certificate fingerprint (SHA1): 4F:DF:DE:64:13:36:0E:74:8B:7F:D3:61:78:29:C4:AA:4F:A4:ED:D8
[root@hadoop-master2 ssl]# openssl x509 -in certs/activemq.pem -fingerprint -sha1
SHA1 Fingerprint=4F:DF:DE:64:13:36:0E:74:8B:7F:D3:61:78:29:C4:AA:4F:A4:ED:D8
# 1.4 配置activemq
# http://activemq.apache.org/how-do-i-use-ssl.html
# https://docs.puppet.com/mcollective/deploy/middleware/activemq.html#tls-credentials
# https://docs.puppet.com/mcollective/deploy/middleware/activemq.html#stomp
[root@hadoop-master2 ssl]# mv keystore.jks truststore.jks /opt/puppetlabs/apache-activemq-5.13.2/conf
[root@hadoop-master2 ssl]# cd /opt/puppetlabs/apache-activemq-5.13.2/conf/
# 填上面步骤设置的密码
[root@hadoop-master2 conf]# vi activemq.xml
...
<sslContext>
<sslContext keyStore="keystore.jks" keyStorePassword="XXXX"
trustStrore="truststore.jks" trustStorePassword="XXXX" />
</sslContext>
<transportConnectors>
<!-- DOS protection, limit concurrent connections to 1000 and frame size to 100MB -->
<transportConnector name="stomp+nio+ssl" uri="stomp+nio+ssl://0.0.0.0:61614?maximumConnections=1000&wireFormat.maxFrameSize=104857600&needClientAuth=true&transport.enabledProtocols=TLSv1,TLSv1.1,TLSv1.2"/>
</transportConnectors>
[root@hadoop-master2 apache-activemq-5.13.2]# chmod 600 conf/activemq.xml
[root@hadoop-master2 apache-activemq-5.13.2]# bin/activemq stop
[root@hadoop-master2 apache-activemq-5.13.2]# bin/activemq start
# 日志查看
[root@hadoop-master2 apache-activemq-5.13.2]# less data/activemq.log
# 2 puppetserver(mcollective client)
# https://docs.puppet.com/mcollective/configure/client.html
[root@hadoop-master2 ~]# cd /etc/puppetlabs/mcollective/
[root@hadoop-master2 mcollective]# cat client.cfg
...
connector = activemq
plugin.activemq.pool.size = 1
plugin.activemq.pool.1.host = hadoop-master2.example.com
plugin.activemq.pool.1.port = 61614
plugin.activemq.pool.1.user = system
plugin.activemq.pool.1.password = manager
plugin.activemq.pool.1.ssl = true
plugin.activemq.pool.1.ssl.ca = /etc/puppetlabs/puppet/ssl/certs/ca.pem
plugin.activemq.pool.1.ssl.key = /etc/puppetlabs/puppet/ssl/private_keys/hadoop-master2.example.com.pem
plugin.activemq.pool.1.ssl.cert = /etc/puppetlabs/puppet/ssl/certs/hadoop-master2.example.com.pem
...
[root@hadoop-master2 mcollective]# mco ping -v
---- ping statistics ----
No responses received
# 3 puppet agents(mcollective servers)
# https://docs.puppet.com/mcollective/configure/server.html
-bash-4.1# puppet agent --configprint confdir
/etc/puppetlabs/puppet
-bash-4.1# puppet agent --configprint ssldir
/etc/puppetlabs/puppet/ssl
-bash-4.1# puppet agent --configprint hostprivkey
/etc/puppetlabs/puppet/ssl/private_keys/hadoop-master1.example.com.pem
-bash-4.1# puppet agent --configprint hostcert
/etc/puppetlabs/puppet/ssl/certs/hadoop-master1.example.com.pem
-bash-4.1# puppet agent --configprint localcacert
/etc/puppetlabs/puppet/ssl/certs/ca.pem
-bash-4.1# cd /etc/puppetlabs/mcollective/
-bash-4.1# cat server.cfg
...
connector = activemq
plugin.activemq.pool.size = 1
plugin.activemq.pool.1.host = hadoop-master2.example.com
plugin.activemq.pool.1.port = 61614
plugin.activemq.pool.1.user = system
plugin.activemq.pool.1.password = manager
plugin.activemq.pool.1.ssl = true
plugin.activemq.pool.1.ssl.ca = /etc/puppetlabs/puppet/ssl/certs/ca.pem
plugin.activemq.pool.1.ssl.key = /etc/puppetlabs/puppet/ssl/private_keys/hadoop-master1.example.com.pem
plugin.activemq.pool.1.ssl.cert = /etc/puppetlabs/puppet/ssl/certs/hadoop-master1.example.com.pem
...
-bash-4.1# service mcollective restart
Shutting down mcollective:
Starting mcollective: [ OK ]
# 其他两台机器一样的操作
# 测试
[root@hadoop-master2 mcollective]# mco ping -v
hadoop-master1 time=41.99 ms
hadoop-slaver2 time=84.87 ms
hadoop-slaver1 time=85.46 ms
---- ping statistics ----
3 replies max: 85.46 min: 41.99 avg: 70.77
更多activemq的设置查看官方文档: ActiveMQ Config Reference for MCollective Users example activemq.xml
# SSL Security plugin
Stomp with TLS (安全传输层协议)用于加密数据。而 security plugin 主要功能有:
- mcollective server要授权才会执行 client 发送的请求。
- create a token that uniquely identify the client - based on the filename of the public key。
- 在请求中添加创建时间和TTL保证数据的完整性(不被拦截、篡改以及重复)。
参考:
- https://docs.puppet.com/mcollective/configure/client.html#security-plugin-settings
- https://docs.puppet.com/mcollective/security.html
- https://docs.puppet.com/mcollective/reference/plugins/security_ssl.html
# 1 生成server秘钥(公钥、私钥)
[root@hadoop-master2 mcollective-security]# openssl genrsa -out server-private.pem 1024
...
[root@hadoop-master2 mcollective-security]# openssl rsa -in server-private.pem -out server-public.pem -outform PEM -pubout
writing RSA key
[root@hadoop-master2 mcollective-security]# ll
total 12
-rw-r--r-- 1 root root 7915 Apr 29 00:06 server-private.pem
-rw-r--r-- 1 root root 1836 Apr 29 00:07 server-public.pem

# 把 private/public 复制到所有的mcollective-servers节点
# 把 public 复制到mcollective-clients节点
[root@hadoop-master2 mcollective-security]# ssh 172.17.0.2 mkdir -p /etc/puppetlabs/mcollective/ssl/clients
[root@hadoop-master2 mcollective-security]# scp * 172.17.0.2:/etc/puppetlabs/mcollective/ssl/
server-private.pem   100% 7915     7.7KB/s   00:00
server-public.pem    100% 1836     1.8KB/s   00:00

[root@hadoop-master2 mcollective-security]# mkdir -p /etc/puppetlabs/mcollective/ssl
[root@hadoop-master2 mcollective-security]# cp server-public.pem /etc/puppetlabs/mcollective/ssl/

# 2 配置mcollective-servers。节点间配置不能同步,TLS配置的证书名称是不一样的!!
-bash-4.1# vi /etc/puppetlabs/mcollective/server.cfg
...
# Plugins
#securityprovider = psk
#plugin.psk = unset

securityprovider = ssl
plugin.ssl_server_private = /etc/puppetlabs/mcollective/ssl/server-private.pem
plugin.ssl_server_public = /etc/puppetlabs/mcollective/ssl/server-public.pem
plugin.ssl_client_cert_dir = /etc/puppetlabs/mcollective/ssl/clients/
plugin.ssl.enfore_ttl = 0
...

-bash-4.1# service mcollective restart
Shutting down mcollective:                                 [  OK  ]
Starting mcollective:                                      [  OK  ]
# 可以通过 /var/log/puppetlabs/mcollective.log 查看详细日志

# 配置一个节点后,mco ping已经不再显示hadoop-master1了!!

# 3 生成client秘钥
[root@hadoop-master2 mcollective-security]# cd /etc/puppetlabs/mcollective/ssl
[root@hadoop-master2 ssl]# ll
total 8
drwxr-xr-x 2 root root 4096 Apr 29 00:15 clients
-rw-r--r-- 1 root root 1836 Apr 29 00:15 server-public.pem
[root@hadoop-master2 ssl]# openssl genrsa -out winse-private.pem 1024
...
[root@hadoop-master2 ssl]# openssl rsa -in winse-private.pem -out winse-public.pem -outform PEM -pubout
writing RSA key
[root@hadoop-master2 ssl]# ll
total 16
drwxr-xr-x 2 root root 4096 Apr 29 00:15 clients
-rw-r--r-- 1 root root 1836 Apr 29 00:15 server-public.pem
-rw-r--r-- 1 root root  887 Apr 29 00:26 winse-private.pem
-rw-r--r-- 1 root root  272 Apr 29 00:26 winse-public.pem

# 把client用户的公钥拷贝到所有mcollective-servers的ssl/clients目录下
[root@hadoop-master2 ssl]# scp winse-public.pem 172.17.0.2:/etc/puppetlabs/mcollective/ssl/clients
winse-public.pem 100%  272     0.3KB/s   00:00

# 4 配置clients
[root@hadoop-master2 ~]# vi /etc/puppetlabs/mcollective/client.cfg
...
# Plugins
#connector=activemq
#direct_addressing=1 决定是否支持点对点消息,这里选择支持

#securityprovider = psk
#plugin.psk = unset
securityprovider = ssl
plugin.ssl_server_public = /etc/puppetlabs/mcollective/ssl/server-public.pem
plugin.ssl_client_private = /etc/puppetlabs/mcollective/ssl/winse-private.pem
plugin.ssl_client_public = /etc/puppetlabs/mcollective/ssl/winse-public.pem
...

# mcollective-server不需要重启!客户端连接测试
[root@hadoop-master2 ssl]# mco ping -v
hadoop-master1                           time=561.29 ms
hadoop-slaver2                           time=601.91 ms
hadoop-slaver1                           time=608.31 ms

---- ping statistics ----
3 replies max: 608.31 min: 561.29 avg: 590.50
理解了功能后,再按条理配置其实感觉就不是那么难了。遇到问题先查看日志!!
# 最佳实践
官网推荐使用 站点管理工具 统一来安装管理,如puppet。下面使用puppet来配置mcollective:
- https://docs.puppet.com/mcollective/deploy/install.html#example
- https://docs.puppet.com/mcollective/deploy/middleware/activemq_keystores.html#creating-keystores-with-puppet
- https://docs.puppet.com/mcollective/deploy/standard.html#write-the-server-config-file
TODO
–END
Related
Related posts
-
MCollective Plugins
2016-04-28
-
VMware-Centos6 build hadoop-2.6
2015-03-08
-
杀鸡焉用牛刀:DuckDB 正取代部分 Spark 场景
2026-02-16
-
基于对象存储的 Spark 数据读写实战:从末尾追加到任意更新
2025-10-28